
SpringBoot整合WebService
155
2023-12-11

来源:简书-程序员小杰
链接:https://www.jianshu.com/p/8cf6ccb765a2
日期:2020.11.10 21:26:33
一、服务端创建方式
由于SpringBoot提供了WebService的starter组件,所以集成WebService相当简单
加入依赖
        <dependency>
            <groupId>org.apache.cxf</groupId>
            <artifactId>cxf-spring-boot-starter-jaxws</artifactId>
            <version>3.4.5</version>
        </dependency>
创建WebService接口
package com.gongj.webservice_server.service;

import com.gongj.webservice_server.DTO.UserDTO;
import javax.jws.WebService;

@WebService(name = "IUserServer", // 暴露服务名称
        targetNamespace = "http://service.webservice_server.gongj.com"// 命名空间,一般是接口的包名倒序
)
public interface IUserServer {

    UserDTO getUser(Long str);
}
创建实体类
@Data
public class UserDTO {
    private Long id;
    private String name;
    private Integer age;
    private String address;
}
创建WebService接口的实现类
package com.gongj.webservice_server.service.impl;

import com.gongj.webservice_server.DTO.UserDTO;
import com.gongj.webservice_server.service.IUserServer;
import org.springframework.stereotype.Service;

import javax.jws.WebService;

@Service
@WebService(serviceName = "IUserServer", // 与接口中指定的name一致
        targetNamespace = "http://service.webservice_server.gongj.com", // 与接口中的命名空间一致
        endpointInterface = "com.gongj.webservice_server.service.IUserServer" // 接口地址
)
public class UserServerImpl implements IUserServer {
    @Override
    public UserDTO getUser(Long id) {
        UserDTO user = new UserDTO();
        user.setId(id);
        user.setAddress("上海市浦东新区");
        user.setAge(25);
        user.setName("gongj");
        return user;
    }
}
创建WebService配置类
package com.gongj.webservice_server.config;

import com.gongj.webservice_server.service.IUserServer;
import org.apache.cxf.Bus;
import org.apache.cxf.bus.spring.SpringBus;
import org.apache.cxf.jaxws.EndpointImpl;
import org.apache.cxf.transport.servlet.CXFServlet;
import org.springframework.beans.factory.annotation.Autowired;
import org.springframework.boot.web.servlet.ServletRegistrationBean;
import org.springframework.context.annotation.Bean;
import org.springframework.context.annotation.Configuration;

import javax.xml.ws.Endpoint;

@Configuration
public class CxfConfig {

    @Autowired
    private IUserServer userServer;
    /**
     * 注入Servlet 注意beanName不能为dispatcherServlet
     (不推荐用这个,官方的demo直接在配置文件配置即可 cxf.path: /webservice)
     * @return
     */
 //   @Bean
 //   public ServletRegistrationBean cxfServlet() {
 //       return new ServletRegistrationBean(new CXFServlet(),"/webservice/*");
 //   }

    @Bean(name = Bus.DEFAULT_BUS_ID)
    public SpringBus springBus() {
        return new SpringBus();
    }


    @Bean
    public Endpoint endpoint() {
        EndpointImpl endpoint = new EndpointImpl(springBus(), userServer);
        endpoint.publish("/api");
        return endpoint;
    }
}
application.yml配置文件配置webservice统一路径前缀
cxf.path: /webservice
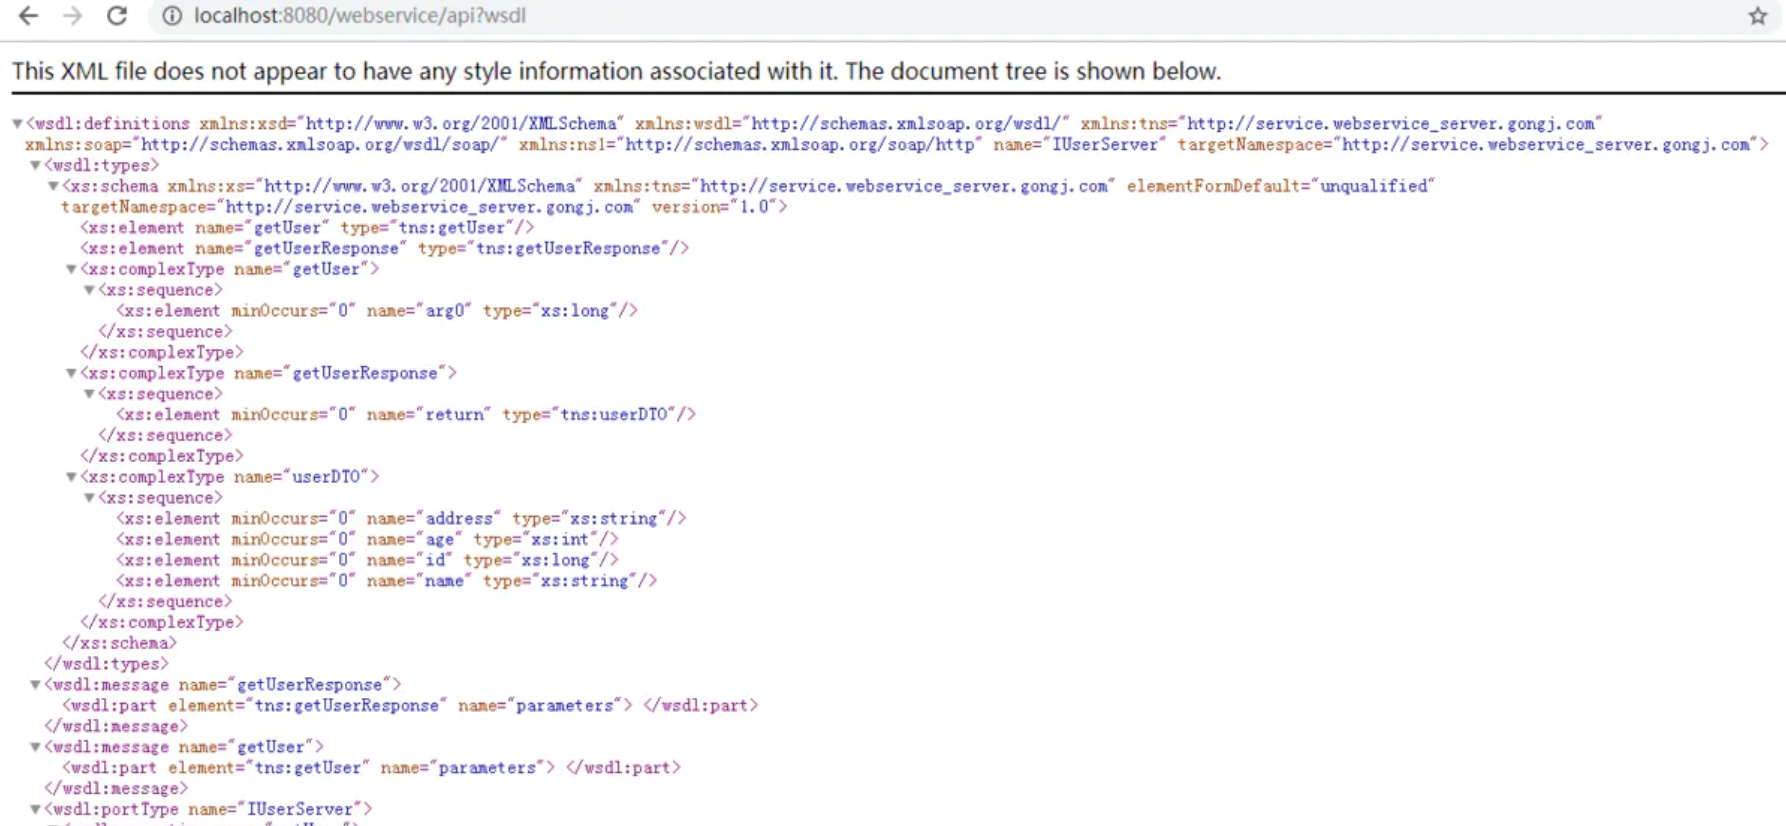
启动服务,进行访问:http://localhost:8080/webservice

点击链接跳转,我们会看到一个页面,这是wsdl服务描述文档。
二、客户端调用方式
加入依赖
<dependency>
  <groupId>org.apache.cxf</groupId>
  <artifactId>cxf-spring-boot-starter-jaxws</artifactId>
  <version>3.3.4</version>
</dependency>
调用
public static void main(String[] args) {
        JaxWsDynamicClientFactory dcf = JaxWsDynamicClientFactory.newInstance();
        Client client = dcf.createClient("http://localhost:8080/webservice/api?wsdl");
        Object[] objects = new Object[0];
        ObjectMapper mapper = new ObjectMapper();
        try {
            // invoke("方法名",参数1,参数2,参数3....);
            objects = client.invoke("getUser", 99L);
            System.out.println(mapper.writeValueAsString(objects[0]));
        } catch (java.lang.Exception e) {
            e.printStackTrace();
        }
    }

输出结果:
{"address":"上海市浦东新区","age":25,"id":99,"name":"gongj"}